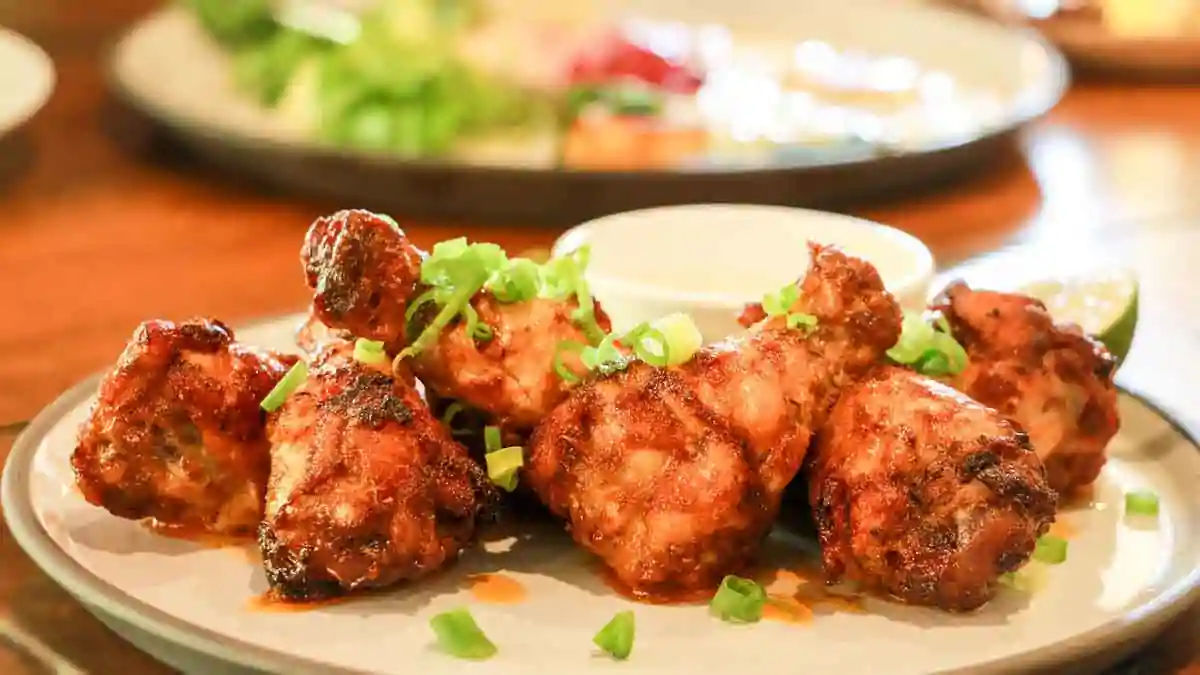
8 Different Ways to Cook Chicken

Chicken is not only a versatile and budget-friendly protein, but it’s also a staple in many cultures across the globe. In this article we’re going to examine 8 delectable techniques that can take your chicken game to the next level.

Table of Contents

different ways to cook chicken

Classic Roasting – The Art of the Perfect Roast Chicken

A well-roasted chicken is an art in itself, providing a succulent, flavorful meal that comforts and satisfies with every bite. To achieve that golden, juicy bird, let’s dive into the essentials of choosing the right chicken, seasoning and trussing, and mastering cooking temperatures and times.

Choosing the right chicken

When selecting a chicken for roasting, the best option is to go for a fresh, organic, free-range bird. These chickens generally have better flavor and texture compared to their factory-farmed counterparts. Opt for a bird weighing between 3 to 4 pounds, which will provide enough meat without risking overcooking. You may also choose between air-chilled and water-chilled chickens. Air-chilled chickens often have a crisper skin due to reduced moisture.

Seasoning and trussing

Seasoning your chicken is crucial for a flavorful roast. Start by patting your chicken dry with a paper towel to remove excess moisture, which will help the skin crisp up beautifully. You can season your chicken with a simple rub of kosher salt and black pepper or create a more complex mix using your favorite herbs and spices. Fresh herbs like rosemary, thyme, and sage can be placed under the skin or inside the cavity, along with aromatic vegetables like garlic cloves and lemon slices.

Trussing is the process of tying the chicken legs and wings close to the body to promote even cooking. While not mandatory, it can help your chicken cook more uniformly and make for a stunning presentation. Use kitchen twine to tie the legs together and tuck the wings under the body.

Cooking temperature and time

Preheat your oven to 425°F (220°C) for the initial high-heat blast, which will help the skin crisp up. Place your seasoned and trussed chicken, breast side up, on a rack set in a roasting pan. Roast the chicken for 15 minutes at this temperature, then reduce the oven temperature to 375°F (190°C) for the remainder of the cooking time. This lower heat will help keep the chicken tender and juicy.

The total cooking time depends on the weight of your bird. Generally, it takes around 20 minutes per pound, plus an additional 10-15 minutes for good measure. So, a 4-pound chicken will take approximately 1 hour and 35 minutes to cook. Use a meat thermometer to ensure your chicken is cooked properly. Insert it into the thickest part of the thigh without touching the bone. The internal temperature should read 165°F (74°C) when it’s ready.

Finally, allow the chicken to rest for 10-15 minutes before carving. Resting allows the juices to redistribute within the meat, resulting in a tender and moist roast chicken.

Finger-Licking Baked Chicken

There’s nothing quite like the crunch of perfectly baked chicken, with its crispy exterior and tender, juicy meat. Baking is a versatile method that allows you to play with different flavors, textures, and presentations.

Marinating for flavor

Marinating is the process of soaking your chicken in a flavorful liquid to infuse it with flavor and tenderness. The ideal marinating time depends on the size and cut of your chicken pieces, but a good rule of thumb is to marinate for at least 30 minutes or up to 12 hours for the best results. Keep your marinating chicken in the refrigerator to ensure food safety.

Your marinade can be as simple as a mix of olive oil, lemon juice, and your favorite herbs, or more complex using yogurt or buttermilk, which tenderizes the meat while adding a tangy flavor. Get creative and experiment with different flavor combinations by using ingredients such as soy sauce, honey, mustard, or hot sauce.

Different breading options

Breading is key to achieving that delicious crunch in your baked chicken. There are many ways to create a flavorful, crispy coating. A classic breading method is the three-step process, which involves coating your chicken in flour, dipping it in beaten eggs, and then rolling it in breadcrumbs. Panko breadcrumbs are a popular choice for their light, airy texture and crispy results.

For a gluten-free option, try almond flour or crushed pork rinds. You can also mix grated Parmesan cheese or crushed potato chips into your breadcrumbs for added flavor and texture. Don’t be afraid to get inventive with your breading mixtures – the possibilities are endless!

Tips for crispy and juicy results

Dry chicken

Pat your chicken pieces dry with a paper towel before marinating and breading. This will help the coating stick better and result in a crispier exterior.

Space out your chicken

Arrange your chicken pieces on a wire rack set over a baking sheet, making sure they aren’t touching each other. This will allow air to circulate around the chicken, ensuring a uniform crispiness.

Preheat your oven

A hot oven is crucial for achieving that golden, crispy crust. Preheat your oven to 425°F (220°C) before baking your chicken.

Bake, don’t broil

While broiling can create a crispy crust, it can also dry out your chicken. Instead, bake your chicken in the middle rack of your oven for even cooking.

Don’t flip too soon

Let your chicken pieces bake for at least 20 minutes before flipping to avoid disturbing the breading.

Use a thermometer

To ensure your chicken is cooked through without overcooking, use a meat thermometer. The internal temperature should reach 165°F (74°C) in the thickest part of the meat.

Grilling – Smoky Chicken Wonders

Nothing quite captures the essence of summer like grilling. The sizzle and smoky aroma of grilled chicken bring an irresistible flair to any outdoor feast.

Direct vs. Indirect Heat

Grilling chicken can be done using either direct or indirect heat, and understanding the difference is key to achieving perfectly grilled chicken. Direct heat involves cooking the chicken directly over the heat source, resulting in a quicker cook time and a more pronounced char. This method is best suited for thin cuts, such as chicken breasts, tenders, or boneless thighs.

Indirect heat, on the other hand, involves cooking the chicken away from the heat source, using the grill lid to trap heat and cook the meat. This method is ideal for larger cuts or whole birds, as it allows for more even cooking and a lower risk of burning.

Flavor-Enhancing Grilling Techniques

Marinate or brine

To infuse your chicken with extra flavor and juiciness, consider marinating or brining your meat before grilling. Marinate your chicken for at least 30 minutes or up to 12 hours, and brine for about 1-2 hours.

Use a spice rub

Create a spice rub using your favorite combination of herbs and spices to add a layer of flavor to your chicken. Apply the rub generously to the meat, ensuring even coverage.

Baste with sauces

Basting your chicken with barbecue sauce or another flavorful sauce during the grilling process can add depth to your dish. Be cautious, though, as sauces with high sugar content can burn easily.

Use wood chips

For an authentic, smoky flavor, add wood chips to your charcoal or gas grill. Experiment with different types of wood, such as hickory, mesquite, or cherry, to find your favorite.

Charcoal vs. Gas Grill

Both charcoal and gas grills have their merits and drawbacks. Choosing the right one for your needs comes down to personal preference and priorities.

Charcoal grills are often praised for their ability to impart a distinct smoky flavor to grilled foods. They’re typically more affordable than gas grills but require more time and effort to start and maintain the fire. Additionally, charcoal grills allow for greater temperature variation, letting you create the perfect sear or slow cook as needed.

Gas grills, on the other hand, offer convenience and ease of use. They heat up quickly, maintain a consistent temperature, and can be turned off without any fuss. However, gas grills may lack the rich, smoky flavor that charcoal grills provide.

Fried Chicken Heaven

Few dishes are as universally adored as fried chicken, with its crispy exterior and tender, juicy meat. Whether you’re a fan of Southern-style, Korean, or another variation, there’s something irresistible about a perfectly fried piece of chicken.

Wet and Dry Brines

Brining is the process of soaking chicken in a saltwater solution (wet brine) or rubbing it with a salt-based mixture (dry brine) to tenderize the meat and enhance its flavor. Both methods have their advantages.

Wet brining ensures the chicken absorbs moisture, resulting in a juicy and flavorful piece of fried chicken. For a basic wet brine, combine water, salt, and sugar, and let the chicken soak for a few hours or overnight in the refrigerator.

Dry brining, on the other hand, requires less time and less mess. Simply mix together salt and your desired seasonings, then apply it directly to the chicken. Allow the dry brine to sit on the chicken for a couple of hours before frying. This method helps to keep the skin crisp and flavors concentrated.

Batters and Dredging Methods

A flavorful and crunchy coating is key to the perfect fried chicken. There are several options for batters and dredging methods that can create different textures and flavors.

Flour-based

This classic method involves coating the chicken in seasoned flour before frying. For extra crunch, double-dip the chicken by dipping it in buttermilk and dredging it in flour again.

Cornstarch-based

For an extra crispy crust, try a mixture of flour and cornstarch. The cornstarch creates a light and crunchy texture that many fried chicken enthusiasts crave.

Wet batter

Combine flour, cornstarch, and a liquid like water or club soda to create a wet batter. This batter creates a smooth, even crust when fried.

Experiment with different ratios and seasonings to create your ideal fried chicken coating.

Frying Techniques and Safety

To fry chicken properly, follow these tips for the best results:

Choose the right oil

Use an oil with a high smoke point, like vegetable or peanut oil, to ensure it doesn’t break down during frying.

Monitor the temperature

Use a deep-fry thermometer to maintain a consistent oil temperature between 350°F (175°C) and 375°F (190°C). If the oil is too hot, your chicken may burn on the outside and be undercooked on the inside. Conversely, if it’s not hot enough, the chicken may absorb too much oil and become greasy.

Fry in small batches

Overcrowding the pan can lower the oil temperature and cause the chicken to cook unevenly. Fry in small batches to ensure each piece is perfectly cooked.

Practice safety

Use a heavy-bottomed pot or a deep fryer to minimize the risk of spills and burns. Always be cautious when working with hot oil, and have a fire extinguisher nearby in case of emergencies.

Stovetop Chicken: The Power of the Skillet

The humble skillet is a versatile kitchen tool that can unlock the true potential of your chicken dishes. From perfectly seared chicken to a quick stir-fry, the stovetop is the ideal place to showcase your culinary prowess.

Searing and Pan-Roasting

Searing is the process of quickly cooking the surface of the meat over high heat, creating a beautiful, caramelized crust. Pan-roasting is an extension of this process, combining the sear with a lower-heat finish to cook the chicken thoroughly. Here’s how to create a perfectly seared and pan-roasted chicken:

Pat your chicken dry

Remove excess moisture with a paper towel to help the chicken sear properly and prevent it from steaming in the pan.

Season generously

Season your chicken with salt, pepper, and your favorite herbs and spices for a flavorful crust.

Preheat your skillet

Heat your skillet over medium-high heat before adding a high-smoke-point oil, such as vegetable or grapeseed oil.

Sear the chicken

Place your chicken, skin-side down, in the skillet and cook until the skin is golden and crisp. Flip and cook the other side for a few minutes.

Lower heat and finish cooking

Reduce the heat to medium-low, cover the skillet, and continue cooking until the chicken reaches an internal temperature of 165°F (74°C) when measured with a meat thermometer.

Stir-Frying

Stir-frying is a quick and flavorful way to cook chicken, perfect for busy weeknights or when you’re craving something fast and delicious. Follow these tips for a successful stir-fry:

Prepare your ingredients

Chop your chicken and vegetables into bite-sized pieces, and mix your sauce beforehand to make the cooking process smooth and efficient.

Heat your skillet or wok

Preheat your skillet or wok over high heat before adding a high-smoke-point oil.

Cook in batches

Cook your chicken in small batches to ensure even browning and prevent overcrowding, which can cause the chicken to steam rather than sear.

Add vegetables and sauce

After cooking your chicken, add your vegetables and stir-fry for a few minutes before adding the sauce. Cook until the vegetables are tender-crisp and the sauce has thickened.

Chicken Paillard

The chicken paillard is a thinly pounded chicken breast that cooks quickly and evenly. Follow these steps for a delicious paillard:

Pound the chicken

Place a boneless, skinless chicken breast between two pieces of plastic wrap and gently pound it with a meat mallet or rolling pin until it’s about 1/4 inch (0.6 cm) thick.

Season and sear

Season the chicken with salt, pepper, and your desired herbs, then sear it in a hot skillet with oil for 2-3 minutes per side or until cooked through.

Serve with a sauce

Drizzle a flavorful sauce, such as a lemon-caper sauce or a simple herb vinaigrette, over the paillard for added flavor and moisture.

Slow Cooker and Instant Pot Chicken Magic

In today’s busy world, convenience is key. Enter the slow cooker and the Instant Pot, two kitchen appliances that have revolutionized home cooking. These tools can help you create flavorful, tender chicken dishes with minimal effort.

Advantages of Slow Cooking and Pressure Cooking

Slow cooking gently simmers chicken over low heat for an extended period, allowing the meat to become tender and flavors to meld. This method is perfect for busy individuals who want to prep their meals in the morning and come home to a delicious, ready-to-eat dinner.

Pressure cooking, on the other hand, uses high pressure to cook food more quickly, while still maintaining tenderness and flavor. This method is ideal for those short on time or looking for a quicker alternative to traditional cooking methods.

Tips for Slow Cooker and Instant Pot Success

Brown the chicken: Although not required, browning your chicken in a skillet before slow cooking or pressure cooking can enhance the flavor and appearance of the finished dish.

Layer ingredients

Place firmer ingredients like potatoes, carrots, or onions on the bottom of the slow cooker or Instant Pot to ensure even cooking. Then, add your chicken and any liquids, such as broth or sauce.

Avoid overcooking

While slow cookers are designed to cook food over a long period, chicken can still become overcooked if left in the cooker for too long. Most chicken dishes should be cooked for 4-6 hours on low or 2-3 hours on high in a slow cooker. In an Instant Pot, adjust the cooking time according to the recipe, and always check for doneness with a meat thermometer.

Use the right cut of chicken

Chicken thighs and drumsticks work well in both slow cookers and Instant Pots due to their higher fat content and more robust texture. Chicken breasts can be used but may require a shorter cooking time to avoid drying out.

Recipes to Try

Here are some delicious chicken dishes to try in your slow cooker or Instant Pot:

Slow Cooker Chicken and Rice

A comforting, one-pot meal featuring tender chicken, vegetables, and fluffy rice.

Instant Pot Chicken Tinga

A flavorful Mexican dish with shredded chicken cooked in a smoky tomato sauce, perfect for tacos or burritos.

Slow Cooker Chicken Curry

A rich and aromatic curry with tender chicken, vegetables, and warm spices.

Instant Pot Chicken and Dumplings

A classic comfort food with tender chicken, vegetables, and pillowy dumplings cooked in a creamy sauce.

Sous-Vide: The Future of Cooking Chicken

Sous-vide, French for “under vacuum,” is a cooking technique that involves sealing food in airtight bags and immersing it in a temperature-controlled water bath. This method has become increasingly popular due to its precision and ability to produce perfectly cooked dishes every time.

Advantages of Sous-Vide Cooking for Chicken

Sous-vide cooking offers several benefits that make it an ideal method for preparing chicken:

Precision

By maintaining a consistent temperature throughout the cooking process, sous-vide ensures that your chicken is cooked to perfection and never overcooked or undercooked.

Juiciness

Since the chicken is cooked in a sealed bag, it retains all of its natural juices, resulting in a moist and tender final product.

Flavor

The gentle cooking process and airtight seal allow the chicken to fully absorb the flavors of any seasonings or marinades, creating a more intensely flavored dish.

Essential Equipment

To get started with sous-vide cooking, you’ll need a few key pieces of equipment:

Immersion Circulator

This device heats and circulates water, maintaining a consistent temperature during the cooking process.

Vacuum Sealer or Resealable Plastic Bags

These are used to seal the chicken and any seasonings or marinades, ensuring an airtight environment during cooking.

Large Pot or Container

A large pot or container is needed to hold the water bath and immerse the vacuum-sealed bags.

Sous-Vide Techniques for Cooking Chicken

Follow these steps to cook chicken using the sous-vide method:

Preheat your water bath

Set your immersion circulator to the desired temperature for your preferred doneness (e.g., 150°F / 65.6°C for juicy, tender chicken breasts).

Season the chicken

Apply a dry rub, marinade, or simple seasoning like salt and pepper to your chicken pieces.

Vacuum seal the chicken

Place your seasoned chicken in a vacuum-sealed bag or a resealable plastic bag. If using a resealable bag, use the water displacement method to remove as much air as possible before sealing.

Cook the chicken

Immerse the sealed bag in the preheated water bath and cook according to the recommended time for your chosen cut of chicken (e.g., 1-4 hours for chicken breasts).

Optional finishing step

After the chicken is cooked, you can sear it in a hot skillet or on a grill for a few minutes to add color and flavor.

Exploring Global Chicken Dishes: A Culinary Journey

Chicken is a versatile protein enjoyed in various forms across the globe. Each region brings unique flavors and techniques to the table, making chicken dishes an exciting culinary adventure.

Moroccan Tagine

A tagine is a North African stew named after the earthenware pot in which it’s traditionally cooked. It typically features a combination of tender chicken, vegetables, and spices slow-cooked to create a rich and flavorful dish. Here’s how to make a delicious Moroccan chicken tagine:

Sear the chicken

Brown your chicken in a large pot or Dutch oven to enhance its flavor and appearance.

Cook the vegetables

Sauté onions, garlic, and any other desired vegetables in the pot, followed by the addition of warm spices, such as cumin, cinnamon, and paprika.

Combine and simmer

Add your chicken back to the pot, along with broth, tomatoes, and dried fruit like apricots or prunes. Simmer the tagine until the chicken is tender and the flavors meld, usually around 1-2 hours.

Indian Butter Chicken

Butter chicken, or murgh makhani, is a popular Indian dish featuring tender chicken pieces cooked in a rich, spiced tomato sauce. Here’s a basic method for preparing this delectable dish:

Marinate the chicken

Combine yogurt, lemon juice, and spices like garam masala, ginger, and garlic, and marinate your chicken for at least 2 hours, preferably overnight.

Sear and cook the chicken

Sear your marinated chicken in a skillet or grill, then cook it through. Set it aside while you prepare the sauce.

Create the sauce

Sauté onions, garlic, and ginger in a skillet, then add tomatoes and spices like garam masala and chili powder. Cook until the tomatoes have softened.

Blend and simmer

Blend your sauce to create a smooth consistency, then return it to the skillet and simmer with the cooked chicken until the flavors meld. Finish with cream and butter for a rich, velvety texture.

Jamaican Jerk Chicken

Jerk chicken is a flavorful Jamaican dish characterized by its spicy and smoky marinade. Follow these steps to make jerk chicken:

Prepare the jerk marinade

Combine allspice, scallions, garlic, Scotch bonnet peppers, thyme, brown sugar, and other spices in a food processor to create a thick paste.

Marinate the chicken

Coat your chicken in the jerk marinade and let it marinate for at least 4 hours, preferably overnight.

Grill or roast

Cook your marinated chicken on a charcoal grill for an authentic smoky flavor, or roast it in the oven if grilling isn’t an option.

Conclusion

There are numerous ways to cook chicken, each providing unique flavors, textures, and experiences. From grilling and roasting to stovetop techniques, slow cooking, and the cutting-edge sous-vide method, there is always a new method to explore and master. Additionally, delving into international chicken dishes allows you to expand your culinary horizons and appreciate the versatility of this beloved protein.

Leave a Comment